Pop out Player/Article to new tab/window
Also on Odysee
Just a short follow up to the previous article How Did I Setup Calibre/Calibre-Web for eBooks. I had a couple of people ask/comment about running this from a Raspberry Pi. Since I had a Pi 3 sitting here I thought I would give it a try and document the differences. Once you get it setup, it should work pretty much the same, but there were two differences in the install process.
First of all, the install script from the Cailbre site doesn't work because the Rasperry Pi uses the ARM architecture instead of x86. Luckily, if you are using Raspbian on your Pi, there is a Calibre build in the standard repositories. Or you can build it from source. Secondly, I ran into problems when running the latest code from the Calibre-Web repository. I am not sure if that is a general issue due to ongoing work in the current branch, or if something was introduced that specifically caused an issue on the Pi. It could also be a compatibility issue if the version of Calibre in the Raspbian repository is older, as I didn't dig too deep. Either way, going back to the 0.6.11 tag on Calibre-Web solved the issue.
Here are all the commands needed to get a basic setup going on an up to date Raspian install. These steps just put everything in folders under the home directory. You may want to change this for a more permanent setup.
#update package database and install Calibre
sudo apt update
sudo apt install calibre

#Create basic Calibre database with a single book I downloaded
mkdir Calibre
calibredb add ~/Downloads/book.epub --with-library ~/Calibre/

#Test start of built in Calibre server (available at http://localhost:8080)
/usr/bin/calibre-server --with-library ~/Calibre

#Clone the 0.6.11 branch of Calibre-Web and install prerequisites
git clone --branch 0.6.11 https://github.com/janeczku/calibre-web
cd calibre-web
pip3 install --system --target vendor -r requirements.txt

#Start Calibre-Web (available at http://localhost:8083)
python3 cps.py

Pop out Player/Article to new tab/window
While I do still use services like Amazon and Google for certain movies, books, and comics, I like to retain actual ownership of my digital media whenever possible. In that spirit I run a Plex server in my home network for my collection of movies and music. After using (and loving) a Kindle (Keyboard model) for over 10 years it was finally time for a new eReader. I have tried reading from a computer/tablet screen and definitely notice a difference in eye strain compared to eInk.
For my work and other projects I still hand write a lot of notes. I think the actual act of writing helps cement the information in my head more than typing does, but referring back to or searching old notes becomes difficult with stacks of notebooks. With that in mind I decided to go with an eInk tablet that runs Android and has full stylus note taking with handwriting to text recognition.
Once that decision was made, I started looking into possible changes to my setup for storing/consuming eBooks and Comics. I already had a decent amount of DRM free eBooks from many of the Humble Bundles, and since the new eInk tablet runs Android, it can run the Kindle and Google Play reader apps for any books that you can't find being sold DRM free (Plus there are ways around the DRM of those platforms, but I won't go into that here...). What I wanted was a system similar to Plex that could catalogue, track and serve out my books so that I could consume them in whatever way I wanted (mostly from my eReader, but it is nice to have options from the browser or just to download the file). The most active one I could find was an eBook manager called Calibre, it was open source and seemed to do everything I wanted. In most of the reading I had done, the biggest complaint seemed to be that the web interface was not that great, so another open source project called Calibre-Web was started. Both packages also support the OPDS standard, which a lot of eReading apps use to sync/download eBooks.
It was a little unclear if both packages were needed, so let's find out.
Calibre
My home server is currently still on Ubuntu 18.04 LTS. Luckily this is still supported by Calibre and they have easy install instructions here. Calibre is firstly designed as a desktop app, which I knew may cause some difficulty installing it on a headless system, but it turned out to be an easy process thanks to some documentation I found.
Prerequisites
Calibre requires the xdg-utils, wget, xz-utils, and a version of Python greater than 2.6. I already had a newer version of python and wget, so I installed the other two using the apt command:
sudo apt install xdg-utils
sudo apt install xv-utils
Install
Once you have the prerequisites installed, they give you a simple one line install command for the Calibre package:
sudo -v && wget -nv -O- https://download.calibre-ebook.com/linux-installer.sh | sudo sh /dev/stdin install_dir=/opt
There are also options for an isolated install or one for systems without updated CA certificates.
Setup
Calibre is normally used as a desktop app that has a server component. Since I was installing this on a headless server I would not be able to do the setup that way. There is a full command line interface and I found a guide that helped with this process at Digital Ocean. Note that if you watch the video, I mistakenly followed the 14.04 guide so the "xvfb-run" part of the commands are no longer necessary and I have omitted that from the text version here.
The first thing you need some eBooks. If you do not currently have any you can download some from Project Gutenberg, which distributes public domain books. Once you have some you will need to create a calibre database and add your books to it. To do so we can use the calibredb command, it will create a new database/folder structure at the location you specify if one does not already exist. An example of adding a single eBook would be:
calibredb add ~/Downloads/MyBook.epub --with-library /mnt/storage/calibre/
Or you can add a full directory structure of books with the --recurse option:
calibredb add /mnt/storage/Books --library-path /mnt/storage/calibre --recurse
It will add any known file types to your database, and from a basic setup purpose that is all that we need to do.
Automatically Add Books
I kept following the steps from the Digital Ocean tutorial to setup a folder that I could copy new books into, and every 15 minutes the system will check and add any new books into the Calibre database. The crontab entry is as follows:
*/15 * * * * /opt/calibre/calibredb add /mnt/storage/Documents/Books/ToAdd --recurse --library-path /mnt/storage/calibre && rm /mnt/storage/Documents/Books/ToAdd/*
Note that you can also add new books via the web interface, but this is a good way for bulk additions, like when you purchase a new bundle of eBooks.
Web Interface
Calibre comes with its' own web interface. It seems to work well and supports OPDS, but I found it clunky to use and not that nice to look at. It is simple to start with the calibre-server command with the path to your Calibre database:
/opt/calibre/calibre-server /mnt/storage/calibre
You can also make it run as a service, similarly to what we will do with the calibre-web package below.
Calibre-Web
I had come across the calibre-web project while researching and it looked pretty good to me. It is a fork of the Library project which aims to provide a modern web interface to a Calibre database and is Python based. It requires Python 3 and is very easy to install. I did not have the Python3 version of pip (Basically a package manager for Python) so I first installed that:
sudo apt install python3-pip
Then I cloned the calibre-web repository using git:
git clone https://github.com/janeczku/calibre-web
They have a handy file that you can run pip against to install all the prerequisites:
pip3 install --system --target vendor -r requirements.txt
And then you can simply start the server with:
python3 cps.py
When you first browse to the site, it will ask you for the location of your Calibre database, and then you can login with the default admin/admin123 username and password.
Start As Service/daemon
Now that I have confirmed the system is working, I want it to start automatically as a service/daemon. My system is using systemd for daemons so following the instructions from the wiki I created a file called cps.service under /etc/systemd/system with the following:
[Unit]
Description=Calibre-Web

[Service]
Type=simple
ExecStart=/usr/bin/python3 /home/lemac/calibre/calibre-web/cps.py
WorkingDirectory=/home/lemac/calibre/calibre-web

[Install]
WantedBy=multi-user.target
Note that for my testing I left the folder underneath my home folder, it may be wise to move this somewhere more global for a final setup. Once that file is created, you can enable the service with the systemctl command and similarly stop/start it as necessary:
sudo systemctl enable cps.service
sudo systemctl start cps.service
sudo systemctl stop cps.service
Usage/Experience
I found the interface of Calibre-Web to be smoother than the built-in one that comes with Calibre. At first finding books through categories and authors was a bit messy. This seemed to be because the tags it read in from the books themselves were either overly complicated or not present at all, so I took some time going through my collection and cleaning up the tags. The system can fetch info and cover images from online databases which also helped, although I would still cut down the number of tags because I like simpler, more general categories.
A really good feature is the ability to convert your ebooks between a number of different formats (e.g. convert mobi to epub). The conversion leaves the original format intact as well, which helps when you are using different devices/apps to read your books.
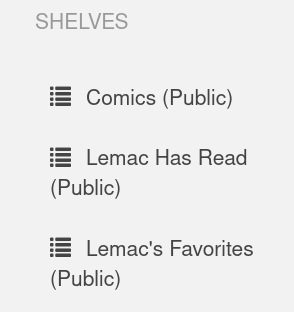
The system also allows multiple users, so you can add other people from your household, share your books and allow them to upload theirs. Virtual shelves can also be created to organize your collection however you like, and these shelves can be made public to to other users on your system. For instance I have created public shelves for all comic books, my favourite books, and the books I have finished reading.
Reading
Reading books using this system is pretty easy. From the browser itself you can read any book in a supported format, and it will keep track of your reading progress. You can also download the file in any of the available formats to read on your computer, or copy over to your reader/tablet via USB or other means.
I prefer doing my reading on eInk screens. I spend so much of my time in front of brightly lit screens, so reading on eInk definitely is more comfortable on my eyes. For my old Kindle (Or if you use the Kindle app), Calibe-Web supports the send to kindle option as long as you have an smtp/mail server setup. This makes it as easy as clicking on the book, and then clicking the "Send Mobi to Kindle" option. The next time you turn on your Kindle, the book will be downloaded.

For my new Onyx Boox device, I wanted to try out the OPDS support that Calibre-Web has, so I started using the Moon+ Reader app. Inside the app you simply create a new "Net Library" and point it to the address of your Calibre-Web server with /opds added to the end. You can then browse through all categories and shelves you have created, select a book you want to read, and tap "Download". The book downloads to your device and you can start reading.
Finding DRM free eBooks and Comics
To get more books into your collection, they will need to be DRM free, which can be a little more inconvenient but not too bad. There are a bunch of publishers/authors who have specified that their books be sold without DRM. If you have a particular store you buy from, do a search to see if they have a DRM free section. Also, the Humble book and comic bundles are generally all DRM free. Here are some links to DRM free sources I have found:
- Ebooks.com DRM free section (store) - https://www.ebooks.com/en-ca/drm-free/
- Project Gutenberg (Free public domain ebooks) - https://www.gutenberg.org/
- Comixoly DRM free section (Comics store) - Link
- Current Humble Books/Comics bundes - https://www.humblebundle.com/books
There are also ways to get your current Kindle collections and other DRM protected books into Calibre, but I will not cover that here.
ToDo
That is basically it for a setup of my new book server. There are some things I still want to tweak, and a couple decisions to make. I want to add a certificate and make the service run over SSL so that it is encrypted. I could possibly move this setup to my online host, so that my collection is available from anywhere, but I think I will keep it local as it is a rare occasion I am out somewhere and need to download a book.
As I said before I am calling these articles "How Did I"s instead of "How To"s because I am by no means an expert, and would like these articles to encourage people to give these things a try and let me know how I could improve my processes. You can participate via the message boards on the BBS, the Discord server (invite link on your user dashboard), via Twitter, or through the comments on the video available on Odysee/LBRY and YouTube.
References
- Calibre - https://calibre-ebook.com/about
- Calibre-Web - https://github.com/janeczku/calibre-web
- OPDS - https://en.wikipedia.org/wiki/Open_Publication_Distribution_System
- Digital Ocean Guide: Link
Pop out Player/Article to new tab/window
Instead of "How To"s I am calling articles like these "How Did I"s. I am doing so for two reasons, the first is just to be difficult, and the second is that I don't consider myself an expert on any of these subjects, so I want to encourage discussion on what I could have done differently or better. Hopefully these can help someone overall, or possibly help me to improve my own techniques, so feel free to leave feedback (Hoping to have a comment system written for the website, but until then feel free to use the BBS message boards, Discord server, or video comments).
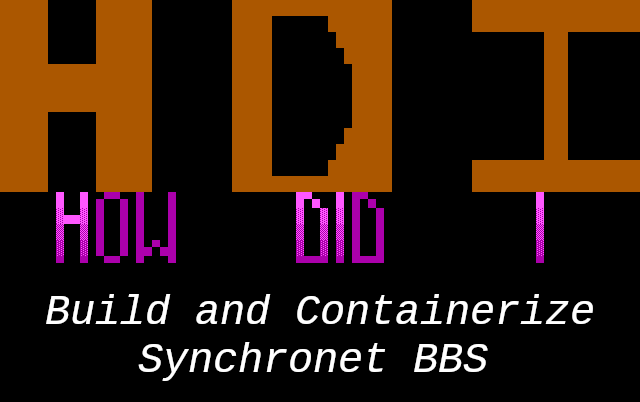
Recently, the Digital Lethargia BBS went live. Since I have separated out the database, web server, and app server portions of Digital Lethargia into Docker containers, I wanted to do the same for the BBS. This helps keeps things modular, easily updated with change control, and somewhat sand boxed. Plus with telnet being a somewhat insecure protocol, I liked the idea of it going to a container rather than directly to the host itself. I chose Synchronet as the BBS system to use because it is still actively maintained, has a good community, and has good management tools. This article assumes a small level of experience with building packages and using Docker.
Prerequisites
The first thing I needed to do was get my system ready to build and test the Synchronet system. I am currently using an Ubuntu 20.04 system, so these steps may differ depending on your distribution. The Synchronet Wiki lists the needed perquisites (with Debian package name) for linux systems here. Personally I was missing the ncurses dev library (libncursessw5-dev) and the Netscape Portable Runtime Library (libnspr4-dev) so I had to install them using apt:
sudo apt install libncursesw5-dev
sudo apt install libnspr4-dev
Since I planned to be running some old DOS doors with the BBS, I was going to need dosemu to run them. There didn't seem to be a package for dosemu in the official Ubuntu repositories, so I ended up finding a package built for 19.10 on Launchpad and installing that using apt (you can use dpkg as well).
wget http://launchpadlibrarian.net/363141379/dosemu_1.4.0.7+20130105+b028d3f-2build1_amd64.deb
sudo apt install ./dosemu_1.4.0.7+20130105+b028d3f-2build1_amd64.deb
Building
Now that I had the prerequisites installed, I was able to proceed with building the package from source. Luckily, the Synchronet Wiki has very good instructions for this and a wonderful Makefile that even handles the code checkout for you, so generally all you need to do is obtain the Makefile and build:
wget https://gitlab.synchro.net/main/sbbs/-/raw/master/install/GNUmakefile
make install USE_DOSEMU=1
Note that if you are just building Synchronet to run outside of a container, I would suggest following the instructions and use the symlink flag (e.g. "make install SYMLINK=1 USE_DOSEMU=1") as that will make subsequent updates/upgrades to the system easier in the future. Since I will be rebuilding the container for updates, I chose to not use the symlink flag.
I got a number of warnings during the build, but luckily no errors. At this point I ran a quick test to see if the scfg utility would load to ensure the build worked. A reminder that by default, Synchronet looks for its' config files under the /sbbs/ctrl folder, so you will need to add the SBBSCTRL environment variable if you are not using that path:
export SBBSCTRL=/home/lemac/src/sbbs/ctrl
Containerization
I already had a Docker environment setup on my machine, so I won't go into that setup here. I am still somewhat of a beginner on the Docker side of things so I am sure there are some ways I can improve this. I started by creating a docker folder in my sbbs folder (The git repository is one level down still so this doesn't conflict). I also created folders and moved in needed items like the dosemu package and termcap file to make things easier.
Within the docker folder I created a Dockerfile, which you can think of as a Makefile for docker containers. It tells docker all the information and pieces it needs to build a container.
Here is the final Dockerfile I ended up with:
#Use Ubuntu 20.04
FROM   ubuntu:20.04
LABEL  Description="Synchronet BBS server"
EXPOSE 23 22
RUN    mkdir /sbbs
COPY   ./ /sbbs/
COPY   ./dosemu/dosemu.deb /tmp/dosemu.deb
COPY   ./termcap/ansi.bbs /tmp/ansi.bbs
RUN    apt update
RUN    apt install -y \
               libnspr4 \
               libncursesw5 \
               zip
RUN    apt install /tmp/dosemu.deb -y
RUN    rm -rf /var/lib/apt/lists/*
RUN    chmod -R 0755 /sbbs/exec
RUN    tic /tmp/ansi.bbs
RUN    mkdir /media/cdrom
COPY   ./dosemu/dosemu.conf /etc/dosemu/dosemu.conf
ENV    LD_LIBRARY_PATH="/sbbs/exec:${LD_LIBRARY_PATH}"
ENV    LANG="en_US"

WORKDIR /sbbs/exec
ENTRYPOINT ["/sbbs/exec/sbbs"]
FROM ubuntu:20.04 - tells Docker which base image to start from and generally needs to be the first line. Since I used Ubuntu 20.04 to build the system, I chose that as my base image.
LABEL - Defines a description for the container
EXPOSE - These are the ports the container will be listening on. These can be mapped to host ports at runtime.
RUN/COPY - The commands themselves are pretty self explanatory, they run a command within the container, or copy items into it. I am doing the following set of steps here:
- Create the /sbbs folder
- Copy the sbbs folder structure in from my dev directory
- Copy the dosemu deb package into the tmp folder
- Copy the ansi-bbs termcap file into the tmp folder
- Run the "apt-update" command to populate the list of available Ubuntu packages
- Install the needed packages (Note that these are the binary versions of the dev prerequisites I installed before building)
- Install the dosemu deb package
- Remove the package list files to save space now that everything is installed
- Make sure everything in the /sbbs/exec folder is executable
- Compile the ansi-bbs termcap info file
- Copy my modified dosemu config file over the default
- Add the /sbbs/exec folder to the LD_LIBRARY_PATH so that the executables can locate their needed libraries
- Ensure the LANG variable is set to "en_US"
WORKDIR - This line defines the working folder the container will be in at runtime. In this case the exec folder of sbbs
ENTRYPOINT - This lines defines the command that will be executed when the container starts. In this case the sbbs server.
Once I had everything defined, I built it with the "docker build" command. I use the -t argument to tag the container (My naming convention is repository:ServiceDateBuild), the -f argument to specify which Dockerfile to user, and finally the required context argument as "." to use the current directory:
docker build -t="diglet:bbs12152001" -f docker/Dockerfile .
The command will download the base image you specified in the FROM line, apply all the changes/commands specified in the rest of the Dockerfile, and package it up as a new container image.
Running/Testing
To test the container I first just ran it in the foreground to see all the output with the "docker run" command, using the --name argument to name the container, followed by the tag of the container image to run:
docker run --name diglet-bbs-test diglet:bbs12122001
At which point I saw the familiar Synchronet output and things were looking good, so time to test it out. Because of the way I started the container, it will only be accessible from the local machine, which is fine for initial testing. To do so I needed to find out what IP address docker gave the container within its' external range to do so I used the "docker inspect" command and looked for the "IPAddress" line in the output:
docker inspect diglet-bbs-test
...
"IPAddress": "172.17.0.2",
...
With that information I was able to load up SyncTerm, and connect to the BBS using telnet. Success!
The nice thing about Syncrhronet is that you can run the scfg utility right from within a session to the bbs. There may situations where you need to be able to do run a command from within the container. To do so I execute the bash shell within the container in interactive mode (-i) using a psuedo terminal (-t)
docker exec -it diglet-bbs-test /bin/bash
This gives you a prompt to run anything you need to.
Persistent config and external access
At this point I have a container image that I can deploy a default Synchronet setup from at anytime. Once deployed I can connect to it and configure it. The next issue I needed to solve was the fact that all the data and config are stored within the container itself, so that anytime I need to deploy an updated container, all that info will be wiped out. Luckily, docker allows you to map folders within your container to folders on the host (-v), even if they already exist within the container itself. Note that you will have to copy the contents of these folders from your initial build folder to the host mapped folders the first time. To allow external access, you can tell docker to map an exposed port on the container to a port on the host (-p). And finally, you can tell docker to run the container "detached" (-d) so that it keeps running in the background. An example of the run command similar to my prod host:
docker run --name diglet-bbs \
 -v /root/dockerdata/sbbs/ctrl:/sbbs/ctrl \
 -v /root/dockerdata/sbbs/text:/sbbs/text \
 -v /root/dockerdata/sbbs/xtrn:/sbbs/xtrn \
 -v /root/dockerdata/sbbs/data:/sbbs/data \
 -v /root/dockerdata/sbbs/mods:/sbbs/mods \
 -p 23:23 -p 22:22 \
 -d reponame/diglet:bbs12122001
Note that I also mapped the entire xtrn folder to my host, which means I would have to copy any updates done to the xtrn folder when upgrading the system as well. A better practice might be to have a separate folder for doors that you add to your system.
And that is basically it. I can now delete and redeploy the container, and as long as I keep the same mapped folders, my config/data will persist.
References
- Synchronet: https://www.synchro.net/
- Synchronet Wiki: http://wiki.synchro.net/index
- Docker: https://www.docker.com/
- DOSEMU: http://www.dosemu.org/
- Ubuntu LaunchPad: https://launchpad.net/ubuntu